Today I’ll explain how to create one of my favourite WordPress features, a widget. Widgets allow WordPress users to add functionality to their website without requiring any coding experience. Before we create our first widget it’s important we understand the way they work.
Click here if you’re only intrested in the complete code.
The sidebar
A widget is added to a sidebar, a predefined place in your theme that can contain multiple widgets. Widgets can be added, removed and rearranged on the Widgets Panel, which can be found at Appearance > Widgets. If the widget is build correctly, you can add it to multiple sidebars at the same time.
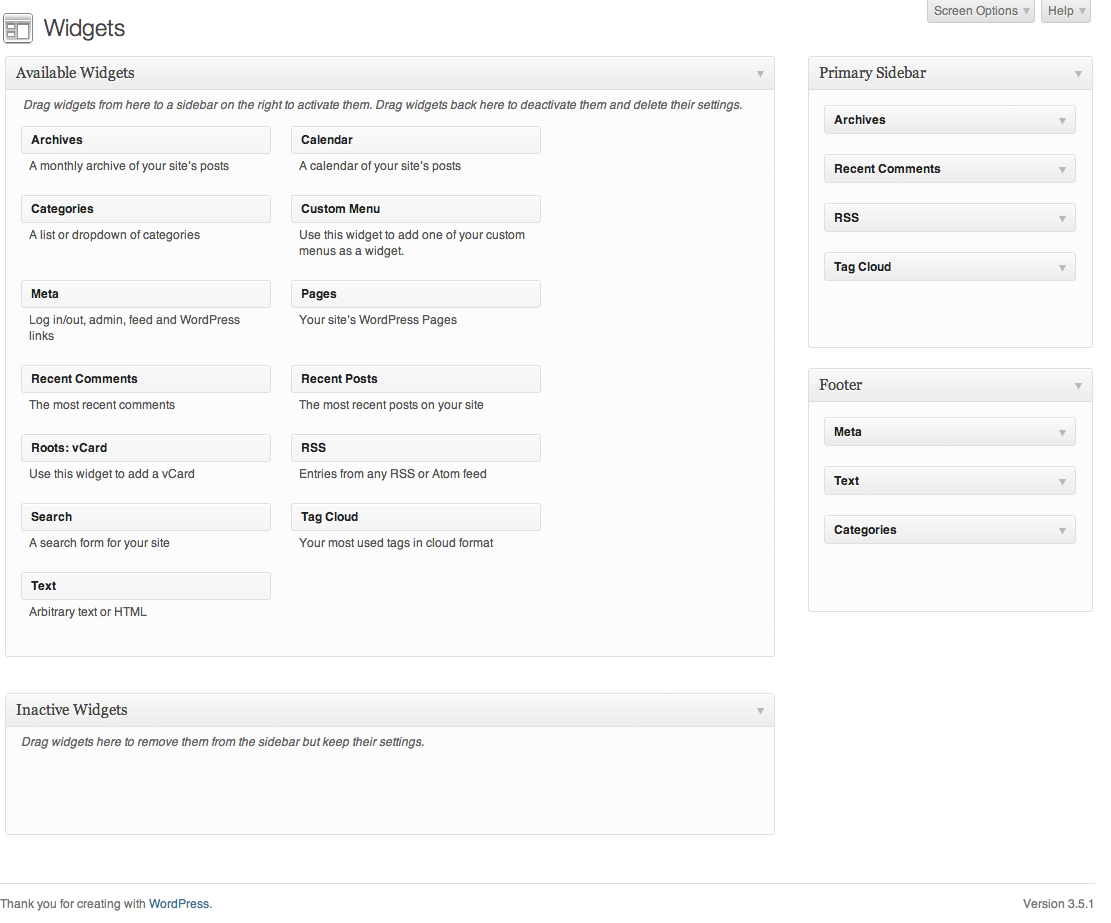
The Widget Panel
In this example we will only be creating a widget, not a plugin (I will create a separate article for this in the future). Our soon to be created widget will be added to a theme, you can pick any theme you want for this as long as it has a functions.php file.
The Howdy widget
We’ll be creating a widget named ‘Howdy widget’, a fun little widget which will greet our website visitors. Our widget will be created in an OOP (Object-oriented programming) way. If you don’t know what this is don’t worry, it’s a good thing :).
The code
Let’s take a look at the complete code and than break it down explaining it piece by piece. Create a new file named ‘howdy-widget.php’ in your theme directory and paste the following code in it.
class BK_HowdyWidget extends WP_Widget
{

	public function __construct()
	{
		parent::__construct( 'bk_howdy_wigdet_id', __( 'Howdy Widget' ), array( 'description' => __( 'This is the howdy widget') ) );
	}

	public function widget( $args, $instance )
	{
		echo $args[ 'before_widget' ];
		echo __( 'Howdy stranger!' );
		echo $args[ 'after_widget' ];
	}

}
Our widget is build in it’s own class named ‘BK_HowdyWidget’. I’ve used a prefix (BK) to prevent having the same class name as other plugins. Note that we’re extending the ‘WP_Widget’ class, this is required for the widget to work.
The Constructor
All we do in our constructor is calling the parent constructor with our widget settings.
	public function __construct()
	{
		parent::__construct( 'bk_howdy_wigdet_id', __( 'Howdy Widget' ), array( 'description' => __( 'This is the howdy widget') ) );
	}
We use the following arguments for the parent constructor:
bk_howdy_wigdet_id
This is our widget’s ‘base ID’, it should be a unique value (again this is why I prefixed it).
__( ‘Howdy Widget’ )
The name of our plugin, made translatable by wrapping it in __( ).
array( ‘description’ => __( ‘This is the howdy widget’) )
Our widgets options, we only set our description here (also translatable).
Front-end display of the widget
The ‘widget’ function (I know, not the most convenient name) is used to display the widget on our website.
	public function widget( $args, $instance )
	{
		echo $args[ 'before_widget' ];
		echo __( 'Howdy stranger!' );
		echo $args[ 'after_widget' ];
	}
It’s important to always echo the ‘before_widget’ and ‘after_widget’ args, this will make sure our widget is wrapped in the correct elements. The ‘Howdy stranger!’ line is where we put our custom code, in this case greeting the visitor.
Registering the widget
Now open your theme’s function.php file and add the following 2 lines of code to register your widget.
require_once( 'howdy-widget.php' );
add_action( 'widgets_init', create_function( '', 'register_widget( "BK_HowdyWidget" );' ) );
Enabling the widget
We can now add our widget to a sidebar by simply dragging it into one. After the widget is dragged into a sidebar it will be visible on your website, remember you can insert our newly created widget as many times to as many sidebars as you want.
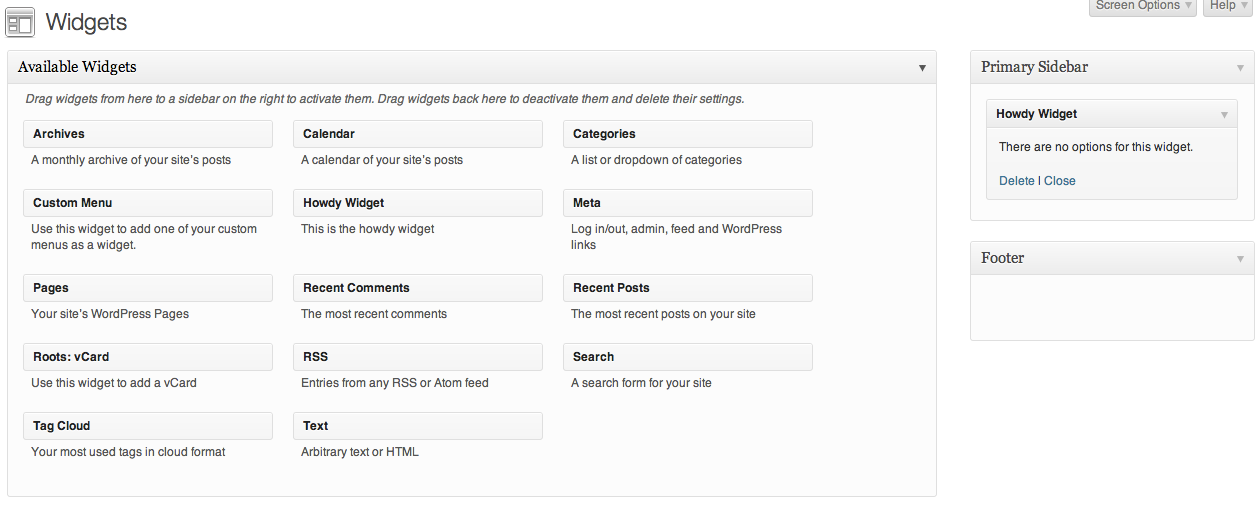
Insert our widget into a sidebar
Adding widget options
Now that we’ve got our widget working let’s add a widget option to it. It would be nice if our widget would greet us by name, I mean come’on we’re no stranger to him. In order to make our widget do this we need to add a widget option called ‘name’ it, so our widget can save it and greet us by it.
The code
Again let’s first check out the complete code, and than explain what we did. Replace everything in your howdy-widget.php with the following code.
class BK_HowdyWidget extends WP_Widget
{

	public function __construct()
	{
		parent::__construct( 'bk_howdy_wigdet_id', __( 'Howdy Widget' ), array( 'description' => __( 'This is the howdy widget') ) );
	}

	public function widget( $args, $instance )
	{
		echo $args[ 'before_widget' ];
		echo __( 'Howdy ' ).$instance[ 'name' ].'!';
		echo $args[ 'after_widget' ];
	}

	public function form( $instance )
	{
		$name = '';
		if( isset( $instance[ 'name' ] ) ) {
			$name = $instance[ 'name' ];
		}
		echo '
';
		echo '<label for="'. $this->get_field_id( 'name' ) .'">'.__( 'What is your name?' ).'</label>';
		echo '<input class="widefat" id="'. $this->get_field_id( 'name' ) .'" type="text" name="'. $this->get_field_name( 'name' ) .'" value="'. esc_attr($name) .'" />';
		echo '

';
	}

}
How it works
The ‘form’ function enables us to add data to the widget option area. It’s important that we use the ‘get_field_id’ and ‘get_field_name’ functions of WP_Widget ($this) so the widget can automatically save the values. After saving the widget in the widget panel we can now retrieve it’s values in the widget function (front-end) by the keys we’ve entered in the ‘get_field_id’ and ‘get_field_name’ functions. In both the ‘form’ and ‘widget’ function the values are stored in the $instance variable.
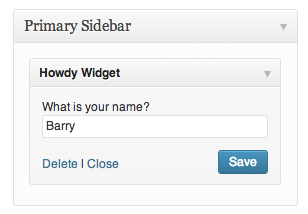
We can now set our name in the widget
Modify option values before they’re saved
Last but not least we can modify (e.g. sanitize) the option values before the widget saves them. To do this we must create an ‘update’ function. The following code strips all HTML tags from the option value ‘name’ before the widget saves it.
	public function update( $new_instance, $old_instance )
	{
		$instance = array();
		$instance[ 'name' ] = strip_tags( $new_instance[ 'name' ] );
		return $instance;
	}
The complete code
class BK_HowdyWidget extends WP_Widget
{

	public function __construct()
	{
		parent::__construct( 'bk_howdy_wigdet_id', __( 'Howdy Widget' ), array( 'description' => __( 'This is the howdy widget') ) );
	}

	public function widget( $args, $instance )
	{
		echo $args[ 'before_widget' ];
		echo __( 'Howdy ' ).$instance[ 'name' ].'!';
		echo $args[ 'after_widget' ];
	}

	public function update( $new_instance, $old_instance )
	{
		$instance = array();
		$instance[ 'name' ] = strip_tags( $new_instance[ 'name' ] );
		return $instance;
	}

	public function form( $instance )
	{
		$name = '';
		if( isset( $instance[ 'name' ] ) ) {
			$name = $instance[ 'name' ];
		}
		echo '
';
		echo '<label for="'. $this->get_field_id( 'name' ) .'">'.__( 'What is your name?' ).'</label>';
		echo '<input class="widefat" id="'. $this->get_field_id( 'name' ) .'" type="text" name="'. $this->get_field_name( 'name' ) .'" value="'. esc_attr($name) .'" />';
		echo '

';
	}

}
Conclusion
Creating widgets in WordPress is very easy if you extend the WP_Widget class and understand how to properly use its functions. If you would like to add your widget to a plugin instead of a theme add the Registering the widget part to your plugin file instead of your functions.php.
I’d love to know if this helped you or if you have a question, so please leave a comment below.


[…] Creating a widget » […]
Nice post, ive never actually looked at creating widgets on clients site, never had the scope to be able to do so. Might have a look at using your tutorial and trying this on my dev site.
Thanks for your comment! Once you’ve created a few widgets and understand how easy they’re build you’ll start creating them for clients allot sooner. Good luck with creating your first widget! 🙂